|
PixInsight Noise Reduction Example |
|
|
|
1. Original Image: Fornax Dwarf by Daniel Verschatse 2. Small-Scale Noise: Multiscale Noise Reduction |
||
|
|
||
|
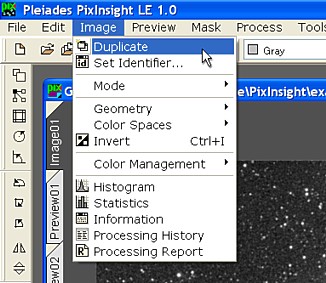
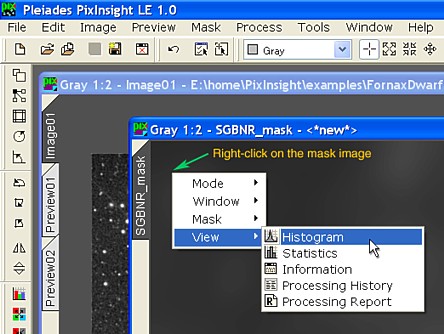
SGBNR stands for Selective Gaussian Blur Noise Reduction. SGBNR consists of a smoothing filter and an edge protection mechanism working cooperatively. Image areas with no detail are softened, as the sky background or smooth nebular regions, but contrast and significant image structures are preserved. For many images, the edge protection mechanism built in SGBNR does a very good job protecting relevant details from being improperly smoothed. In these cases, appropriate edge protection parameters suffice to achieve the goals of efficient large-scale noise reduction and detail preservation. Some images, however, require additional protection. In general this happens when small bright details must be preserved on both very dark and very bright areas of the image. The edge protection algorithm will still do a good work to preserve small bright details over dark regions. However, slight brightness variations on highly illuminated areas will not be detected as edge protection candidates, and the smoothing filter will erase them. Using more aggressive edge protection parameters cannot help in these cases, because edge protection may easily become excessive for dark areas. Fortunately, situations as described in the preceding paragraph can be fixed very easily with the use of a protective mask image. This is because on bright image areas the signal-to-noise ratio is much higher than on dark areas. This way a mask can be used to diminish (or even avoid completely) noise reduction on bright areas, while allowing full noise reduction on dark areas. In the present example we have some areas on the image that require special protection. In particular, the bright star near the right border has a large diffraction spike and some subtle contrast variations that we don't want too smoothed. The center of the Fornax Dwarf galaxy requires also less noise reduction than surrounding areas. We need a SGBNR mask for our example image. To build our mask we need a duplicate of the image. The main menu option is used for this task:
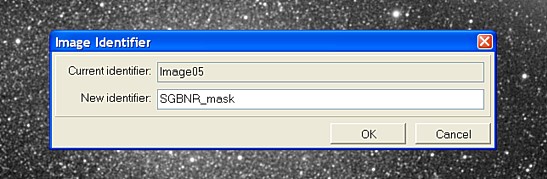
This creates a new image window with an exact duplicate of the original in its current state. When working with several image windows in PixInsight, a good practice is to assign meaningful identifiers to images, according to their specific functions. This greatly simplifies things and avoids potential mistakes. The main menu option (see it on the figure above) pops up the Image Identifier dialog box, where we type in an appropriate identifier in our example:
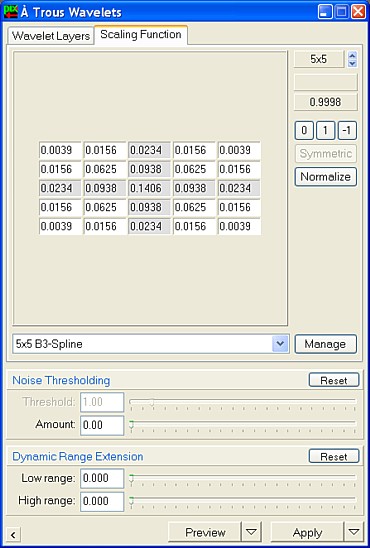
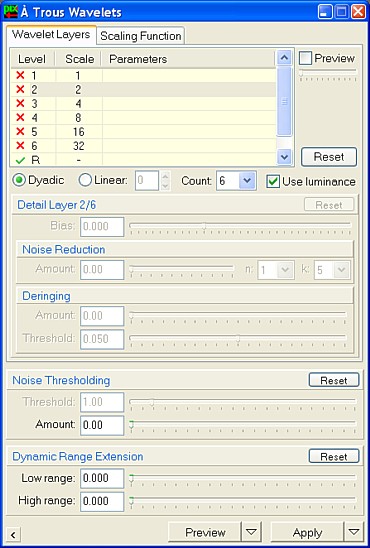
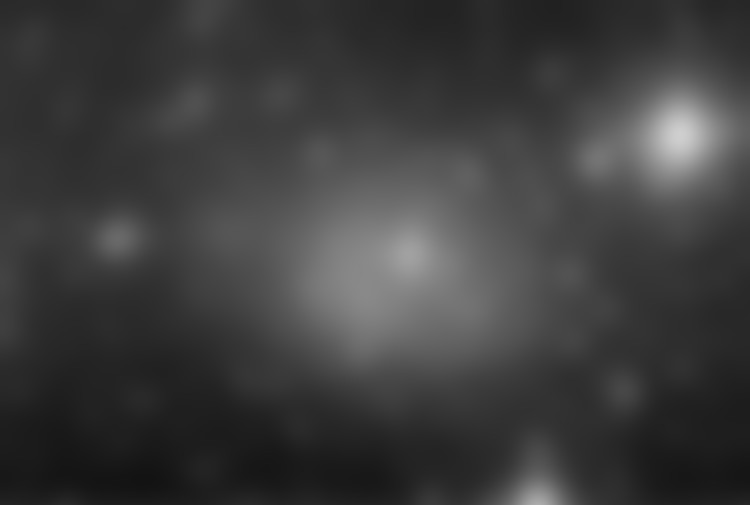
From now on, we'll have no doubt about which image window corresponds to our SGBNR mask. We want to isolate the brightest image features to protect them from excessive smoothing. However, we want to apply this protection gradually. For example, we don't want an abrupt difference between protected and unprotected areas, but an increasing protection as a function of brightness. This requires a blurred mask. PixInsight LE doesn't include the Convolution process that is part of the Standard edition process set. Convolution is the natural way to apply a Gaussian blur. However, the ATrousWaveletTransform can also be used to blur images very efficiently. Just remove some small-scale components from the image, and blur done. Below you can see how we did for the present example. The 5x5 B3 Spline scaling function does a good job isolating larger scales.
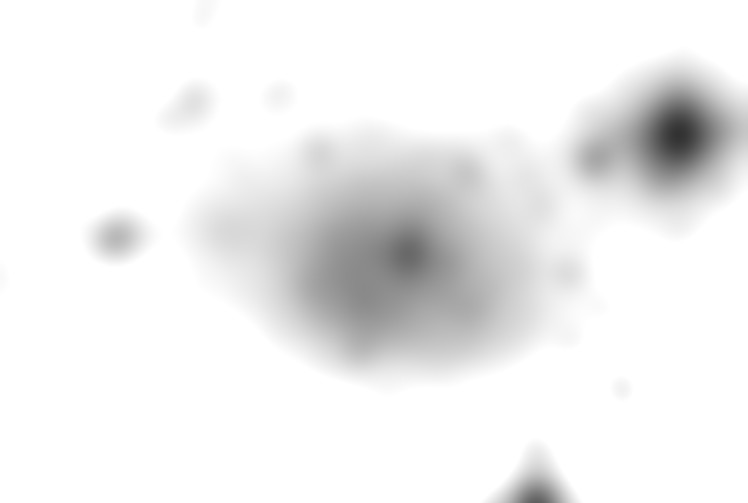
The first six detail layers of the dyadic sequence have been disabled. This generates a greatly blurred image:
But we still aren't happy with this mask. It would protect bright areas well, but the sky background would also be protected to some degree, and this is not what we want by any means. A simple HistogramsTransform can fix this. By right-clicking on the image we access the image view context menu. On this menu we choose the option:
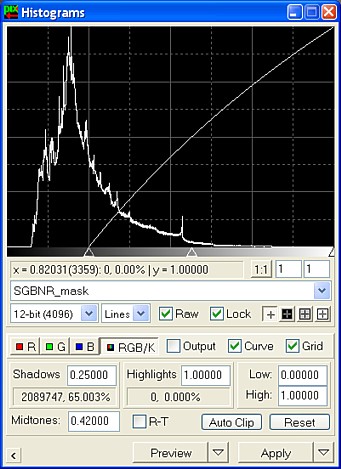
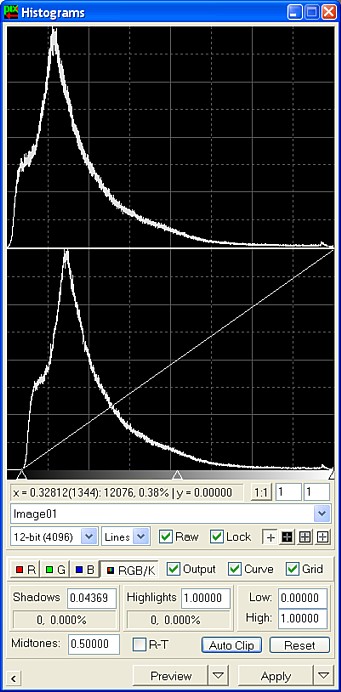
and then the Histograms processing window shows the image histogram. Below you see the Histograms window with the adjustments required to transform the SGBNR mask to meet our needs in the present example:
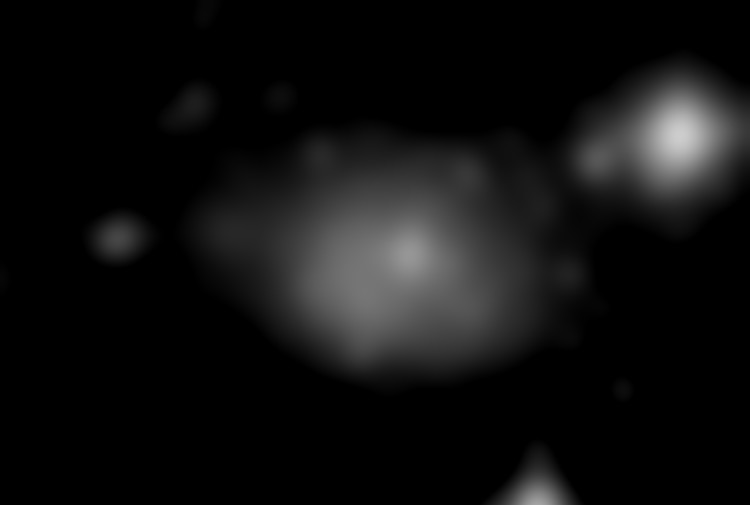
Note the increased Shadows clipping parameter to achieve a black sky background. The Midtones balance parameter has also been adjusted to enhance bright areas a bit. After applying the above histograms transform, this is the resulting mask image:
What we actually need is exactly the opposite to the above mask. We want full noise reduction on the background and protected bright areas. Since black mask pixels are protective and white mask pixels are permissive, we must invert our mask. This is the final SGBNR mask after selecting (or just pressing Ctrl-I):
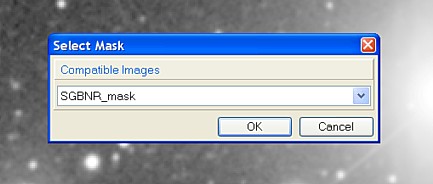
Finally, the mask image must be selected as the active mask for the image being processed. This can be done with the main menu option, or by pressing Ctrl-M. The SGBNR_mask image must be selected on the Select Mask dialog box:
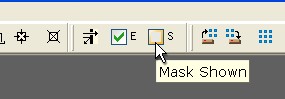
Now you know why assigning appropriate image identifiers is so important in PixInsight. By default masks are shown in PixInsight. The mask image is shown over the image to inform you of protected areas. This feature does not modify the image in any way; it's just a visual feedback. Hide the mask with from the main menu, or by clicking the corresponding tool check box:
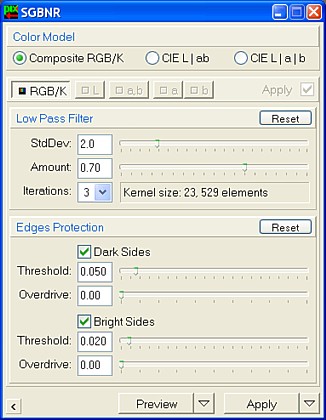
This is our SGBNR parameter set for this example. It is very important that you focus your attention on two things on the figure above. First the edges protection parameters. Quite protective values are being used. This is because the image includes extremely small features that we must protect from excessive smoothing. Since most of these small features are stars, the Bright Sides Threshold parameter is more protective than its Dark Sides counterpart. Second, the Low Pass Filter parameters. Note that a recursive filtering process has been defined. You know this by the Iterations parameter greater than one and Amount less than one. Three iterations and a 2.0 standard deviation value identify an aggressive SGBNR filter. The image contains noise at a relatively large scale, hence the relatively high standard deviation (2.0). How did we find the above parameters? Simple: (1) we have a lot of experience with SGBNR since we have used it many times (= practice!) and (2) we've had the necessary patience to try out many different parameters, fine-tuning them to get a good result. Or, do you really believe that very good results can be achieved with little effort? Nope! After SGBNR, the histogram of our example image shows a small unused portion at the shadows end. This is a fine side-effect of SGBNR denoting that a smooth, uniform background has been achieved over the entire image.
As you see, a small adjustment of the shadows clipping parameter optimizes the dynamic range usage without clipping a single pixel. The final histogram is shown on the top panel of the Histograms window. |