|
Creating Previews |
|
|
|
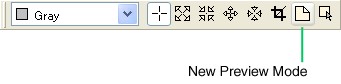
Dynamically Creating a Preview To Select the New Preview Mode |
|
|
|
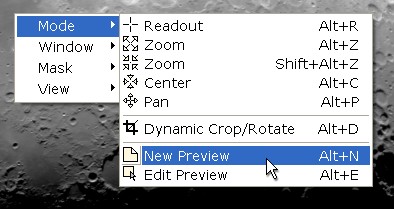
In PixInsight LE 1.0, you can create an unlimited number of preview objects on any image window. There are no specific restrictions for previews, other than the fact that a preview rectangle cannot exceed the dimensions of its parent image. You can create and define new previews in two ways: dynamically with the mouse cursor, and parametrically by entering preview coordinates and sizes. Dynamically Creating a Preview Besides the obvious fact that you need an image window to create a preview in PixInsight, previews can only be defined dynamically on image views in the New Preview mode. The New Preview mode is only enabled for image views; it is disabled for previews. This is because you cannot define previews in a recursive way, that is, you cannot create previews inside previews.
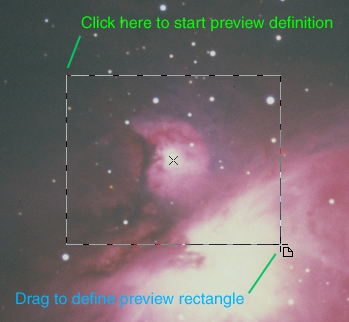
Once in the New Preview mode, click anywhere on the image view and drag the mouse to define the preview's rectangular area:
Release the mouse when you are done, and a new preview will be created:
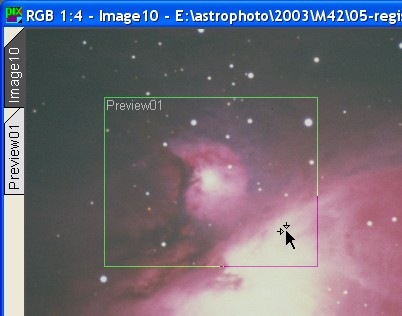
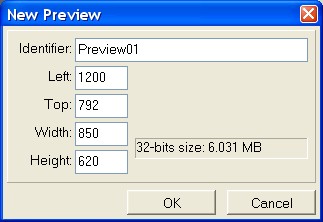
If you want to create a preview that comprises the whole image, use the window's extended work area (resize the window as necessary if it's fitted to the image) to define a rectangle bigger than the image. Click at a location beyond the image's top left corner, and drag to a location beyond its right bottom corner. Note that when you create a new preview its corresponding view selector appears on the view selector tray. Default preview identifiers are assigned when the user does not (or has no way to) provide a custom one. Of course you can easily change the preview's identifier at any moment. Just after preview creation, the Edit Preview mode is automatically selected, allowing you to reposition and/or resize the preview, if necessary, as explained in incoming sections. Parametrically Creating a Preview Sometimes you may know in advance the precise anchor coordinates and dimensions of the preview area you need. When that's the case, you can create a preview through the main menu item, which pops up the New Preview dialog box:
where you can type the magic numbers. You can also provide a custom identifier on this dialog, or simply leave the default one that is given automatically. If you specify an already used preview identifier, PixInsight will turn it into a unique identifier within the image context by appending an integer number to it, starting from one, and increasing it until no matching identifier is found. For example, if a preview exists with identifier Preview01, the above dialog box would try Preview011 as the new preview identifier. If Preview011 would already be defined, Preview012 would be used, and so on. |